Wednesday, December 30, 2009

Last Installment of Digital Scrapbook Pages

Here are the last few pages from my photo book. I did 30 in all. I look forward to making next year's book. Email me with any questions. I hope to do a training on this software in the new year.


Happy New Year!!!!!

Monday, December 28, 2009

Installment #7 of Digital Scrapbook Pages

Four more pages from the photo book. I hope you like them all. They were super fun to make. I also loved that I could print multiple of copies of the book. I just switched out a few photos to be more relevant to the recipient.


Saturday, December 26, 2009

Installment #6 of Digital Scrapbook Pages

I hope you all had a fabulous Christmas. Mine was filled with lots of family, food and love. I couldn't ask for anything more.

Here are the next four pages from my photo book.


Check back tomorrow for a few more pages.

Wednesday, December 23, 2009

Installment #5 of Digital Scrapbook Pages

This is the last post until after Christmas. Check back on the 26th for 4 more pages.


Merry Christmas!!!

Tuesday, December 22, 2009

Installment #4 of Digital Scrapbook Pages

Next round of digital scrapbook pages. I really fell in love with this method of scrapbooking. It took the one part of scrapbooking that I dislike out of the process. Sorting and printing pictures to the size I want them. This software lets you drag and drop. Gotta love that.


Monday, December 21, 2009

Installment #3 of Digital Scrapbook Pages

Here are 4 more pages from my Digital Scrapbook that I made for some of my family this year.


Friday, December 18, 2009

Installment #2 of Digital Scrapbook Pages

Here are the next 4 pages that I included in my book. Check back Monday for the next couple. Have a great weekend.

Thursday, December 17, 2009

Where Have I Been?

OK, it has been far too long. Many have asked what I have been working on. Well among other things, I have been working on learning how to digitally scrapbook with the new Stampin' Up! My Digital Studio software. I have completed 30 pages to be printed as a bound photo book for some Christmas presents. I will post of few of these pages each day between now and the end of the year. I love this software and am really looking forward to future downloads.

Here is a 6x6 card I made to get my MDS certification, I love that it prints the front of the card and both sides of the inside of the card. BTW- I used the SU print services for all my printing. Yes, there are cheaper places out there, but I found SU to average in price and high on quality. So I am going with what I trust.


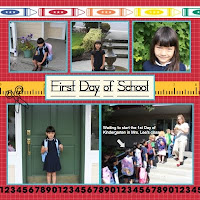
Here are the first few pages from the photo books I did. Most are from scratch and a few I started with some templates.


Check back tomorrow for the next installment of pages.

Sunday, October 18, 2009

October Stamp Club Projects

Here are the three projects we did at Stamp Club this month. We focused on Christmas and used lots of stuff from the Holiday Mini Catalog.

On this card we used the Merry Moments Designer Paper, Kraft and Real Read cardstocks, Mistletoe Ribbon and Big On Christmas Stamp set. The edge of the paper has faux stitching done and the tree is paper pieced.
This card is done with the Soft Suede, Real Red and Whisper White cardstocks, Christmas Cocoa designer paper, Four the Holidays and Delightful Decorations stamp sets, and coordinating Ornament punch.
The final card used the 1 3/4" circle punch with the Serene Snowflakes stamp set. The snowflake was inked in Soft Suede and then dabbed with Champagne Mist Shimmer paint. The greeting is from the Four the Holidays stamp set.

Friday, October 16, 2009

Girls Weekend

I am headed out today for a fun weekend with some girl friends. We plan on wine tasting, eating out and relaxing. I am super excited. Here are a few pictures of some things I made to take to give to everyone.

These wine tasting note books were stamped with a retired set called Sun Ripened. It is one of the few sets I have kept throughout the years despite being retired.


Of course you can't have a weekend with the girls without chocolate!

Of course we are going to need to hydrate. The paper is also a favorite retired item: Parisian Summer. I used the 1 1/4" Circle punch for the hole to hang on the water bottle. I didn't get a photo but surrounding the hole is a scalloped circle.

I put together little pedicure packages for everyone. If we find ourselves needing to fill time, we may do self pedicures. I also got some SUPER soft socks from Bath and Body Works to put on after we are done. I used rub-ons to coordinate the foot files with the mini buckets of supplies.
Here is a little survival kit I put together. It has Kleenex, Wisp Disposable Toothbrushes, Lotion, Nice Smelling Hand Sanitizer, and Breath Mints.


Thursday, October 15, 2009

Shower Invitation

I meant to post this back in September. I made these for the shower I hosted in August. Unfortunately I didn't keep a finished product to photograph. I found my rough draft today, so here it is. The back piece has directions printed on it.

Tuesday, October 13, 2009

Another Ornament Card

I love this stamp set and punch not to mention the shimmer paints. I just can't get enough. This isn't my favorite card, but it was the first that I made. I can't wait to play with this set again soon.

Sunday, October 11, 2009

Backpack Box

OK, so I am a little behind the times. These were all the rage a while ago. However I just got around to making one. This is my first one. Now that I know how to put it together I may try another one and embellish it a little more. This one is relatively simple. I used the Melon Mambo cardstock along with my favorite Razzleberry Lemonade Paper. The ribbon is the Polka Dot Rich Razzleberry. The buttons are from the Playground Buttons package.

I think these would be cute party favors, teacher gift packaging or teddy bear packs. Lots of ideas come to mind for these.

Friday, October 9, 2009

September Stamp Camp Projects- Last 3

Here are the final 3 projects we did at Stamp Camp on September 26th. This first card was done with the Delightful Decorations and Ornament Punch from the Holiday Mini. The Champagne Mist Shimmer Paint was used on the ornament AND in a spray made with rubbing alcohol. The alcohol was sprayed onto the white background before it was run through the Big Shot with the Texture folder making a very shimmery background paper. The greeting is from the Four the Holidays Set in the Holiday Mini.

Here is another simple card. The stamp set used is Tree Trimmings from the main catalog. The colors are Brocade Blue, Real Red and Old Olive. The designer paper is Merry Moments. The strings are stamped in gold. It's fun to work with square cards. I need to do it more often.

Last but not least we made these ornaments. I got the pattern off of the SU demo site. First we wheeled the Rich Razzleberry box then put it together. Before we glued it, we tied the silver cording to the Razzleberry ribbon and laid it in the box with the ends hanging out. Once the box was put together we added the beads, tied it off and trimmed it. The Medallion the same stamp from Circle Circus stamped three times. One time in each color, Rich Razzleberry, Crushed Curry and Handsome Hunter. Then we used the punches to punch out the parts of the images we wanted and layered them together. The Pretties Kit was used for all the beads and half pearls.

Hope you enjoyed all the samples from my most recent stamp camp. Let me know if you have any questions.

Thursday, October 8, 2009

September Stamp Projects Day #3

Round 3 of Stamp Camp Projects. The first card is a fun Halloween card that we did using the Pumpkin Patch set from the Holiday Mini. The center pumpkin is stamped on scrap paper and cut out. Stamp the bottom pumpkin, lay the cut out pumpkin where you expect to place it so that you can stamp the top pumpkin where you want it. Be sure to remove the cut pumpkin before you stamp the top pumpkin.

The second card we did is a very simple card using the Christmas Cocoa paper and Serene Snowflakes from the Holiday Mini. The white piece is stamped with snowflakes in Real Red. We used a Q Tip to dab a small dot of Frost White Shimmer Paint into the center of each snowflake. The red piece is the specialty designer paper. The Merry Christmas was punched out using the Wide Oval Punch and then layered on a red Tag created with the Tags Sizzlet die. The ribbon is from the Mistletoe Ribbon Originals.

This third project was done with the Treat Boxes that SU carries in the main catalog. We used the double stitched Real Red Riboon and Serene Snowflakes stamp set. The snowflake is stamped in Chocolate Chip and then sponged with Close to Cocoa. We embossed the entire piece of paper with Glassy Glaze two times to create a really thick glossy image. The greeting is from Teeny Tiny Wishes and then layered onto a red piece punched with the Modern Label punch.

Tomorrow I will post the last three Stamp Camp Samples.