Monday, November 24, 2008

What to Do???

What on earth does one do when their daughter who loves pink gets all blue ski equipment???

Chapter 1
My daughter lives in a pink world, nothing is quite right with her unless everything is pink. It's pretty crazy, but she's 3 so we all know the world revolves around her right? Well we had to outfit all three kids with ski equipment this year. Luckily we had a set from her older sister. However the skis were ...... grey and blue. Not a problem, until big sister came home with new "pink" skis that daddy got her. So little sister, who lives in a pink world, completely rejected the blue skis- b/c now she knows they come in pink.
Chapter 2
The next day we went to the local ski swap to fill in the gaps of equipment. We needed to get a helmet for our little pink girl. Well, being 3 it's hard to find helmets small enough without spending $80. We found.....1 and it's.....Blue. Arghhhh Well at least it matches the skis she hates. Literally the same tone of blue, a perfect match.
Chapter 3
Mom to the rescue. Thank goodness for SU!!! I went to my craft room and pulled out some Pink Flower Decor Elements and we customized her helmet and skis. She was so excited. Now her equipment matches and in her world they are "PINK". She now sees right past the blue and grey. You never know when ones crafting stuff can save the day.

Here are pictures of the newly customized skis and helmet.


Unfortunately at this time these particular Decor' Elements flowers are only available to demonstrators. We can get them in bulk to demo at workshops and what not.

Sunday, November 23, 2008

November Stamp Club Samples

Here are the projects we did at stamp club this last Friday.

The first project we did is a simple ornament using the new Circle 3-D Ornament Die with the Big Shot. These are the same ornaments that you can make using the Star Bright Kit. However, with the die you can make them with whichever paper you decide. We chose Ski Slope.


We also did a holiday version of the CK Convention make and take that I previously posted. We left the ribbons long so that we can re-tie when we are ready to use. They also got to dress them up with glitter and stamping on the inside (both of which we did not do at the convention).


This project was done by sealing a Kraft envelope and punching the top two corners with the tag punch. This created a small basket to put Hot Cocoa and a Candy Cane in. The outside was decorated using punches and the Winter Post set (I love this set and need to use it more before it's gone.)


Of course we had to do a card. This card uses the Season of Friendship set that is in the Holiday Mini. The tire swing is emulated using a Jumbo eyelet. I found this idea on SCS. The tree has a very very narrow strip of glitter on the tops of the branches. The strips got slightly thicker the closer I got to the center of the tree. I also put a little glitter on the top of the eyelet and along the torn snow field. The colors used were Real Red, Baja Breeze, Chocolate Chip and Shimmery White Cardstock.


Thanks for stopping by. We are looking for a couple new club members to start in a club this coming February. If you are in the area and would like to find out more or sign up, email me.

Wednesday, November 12, 2008

6x6 Album With A Twist

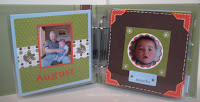
Here is a 6x6 Album done with a twist. It is a sample album I made for the CK Convention. Here's the twist- Each page is actually a 6" x 12" page of cardstock folded in half and adhered together on the sides. Each page is a DVD Pocket. There are 12 pages. One for each month of my son's life. We will be burning all of his pictures from each month to a disc and placing those discs into the book. The whole book was done with one Simply Scrappin Kit "Rock-a-Bye Boy". There was lots of designer cardstock and self-adhesive diecuts left so I will probably do another one as a gift. The album took between 3 and 4 hours to complete. I think that's great for an album that has every picture for the 1st year of a child's life :)

Here is the cover and a page showing how the disc is placed.


Here are the rest of the pages:


Tuesday, November 11, 2008

Decor Elements Jingle Jar

Here is a candy jar I made with the "Jingle all the Way" Decor Element. The jar is a 1 gallon jar and I used the small size of DE. This is a a great inexpensive project to do. I got the jar at Target for @9 and the small DE was only $3.50. I applied the DE and made a chipboard tag that I tied on with the new striped Grosgrain Ribbon from the Holiday Mini. The tag has Snow Flurries, Rhinestone Brad and Half Pearl that add some sparkle and dimension.

Monday, November 10, 2008

Country Living Holiday Kit Samples

Here are a few samples that I made from the Country Living Holiday Kit. This is a fabulous kit with over $100 worth of stuff in it for only $49.95. Order Online today HERE

Here is a few pictures of a beaded garland with the photo frames hanging from it. A cute idea for the holiday mantel decor. I think I may put it around a wall mirror I have hanging in my house.


Here are some gift tags.


Here are some ornaments.


Here are some wine charms and a place card holder.


Last buy not least. Here is a silver tree with glittered chipboard ornaments.


All these pieces were made from the same kit. I tried really hard to only use items in the kit so you can see all you can do. I did not use all the pieces- yet. The diecut designer paper and chipboard make putting these pieces together a snap.

Wednesday, November 5, 2008

CK Scrapbook Convention Make & Take Sample

Here is one of the samples for the Make and Take Project that will be at my Creating Keepsakes Scrapbook Convention Booth next week. This particular sample uses the Sweet Always Designer paper. The booth will also have, Holiday Treasures, Ski Slope, and Frosty options available for this project. All except the Frosty will use the Curly Label Punch and coordinating stamps. The Frosty ones will use the Designer Label punch and Winter Post stamp set. The stamping on the inside will be optional. When there are lines at the booth, we will not offer this option.


CK Convention Special: During the convention anyone who orders 4 large or 3 large an 1 medium punch will receive their choice of a FREE small punch valued up to $6.95. This offer will only be available November 14 & 15th. Orders must be placed at the booth or via phone or email during those times. Unfortunately I can't offer it online because there is no way for SU to not charge your for the free item. When you call be sure to leave a message as I will be at the Convention Center.

Tuesday, November 4, 2008

Decor Elements Advent Calendar

Here is an advent calendar that I did with the Christmas Countdown Decor Element piece. I used a picture frame, removed the glass and covered the tag board backing with textured poster board. I applied the Decor Element and then screwed a hook into the tag board and trimmed the pointy part off the back of the hook. Many different designer papers were used, I leaned towards holidayish paper. I applied the papers to the raw SU chipboard. Then I diecut them with the Big Shot. I tried using the scallop die that SU carries, but it looked funny. The scallops didn't really go well with the Holiday theme. I am hoping the SU will start carrying the basic dies like circles and ovals. To finish the tags off I used the Crop-a-dile to punch and apply eyelets to the tops of the ovals. I was going to embellish further, but decided I liked the simplicity.


Monday, November 3, 2008

Star Bright Kit Ornaments

As promised here are some pictures of the ornaments I made with the Star Bright Ornament Kit in the Stampin' Up! Holiday Mini catalog. I loved playing with this kit. It went together very quickly.

Here are a few of the stars I did. The stars come diecut and scored so all you have to do is fold and embellish if you'd like. I also plan on adding a couple stars to the front of some gift bags and gift packages. I embellished these all differently. I used lots of Pretties Kit Items, Jingle Bells, and Glitter (green, blue & dazzling diamonds). I found the easiest way to adhere these together was with Dimensionals.


Here are the globe balls that I made with the strips of designer paper. Again, they are embellished, with a Pretties Kit, Glitter, Rub-Ons, etc.

Lastly, here are the balls made with the small circles. Again, the circles are diecut and scored, so they are super simple to put together. I like the balls made with 8 and 20 circles. I will probably make more with 8 because they are faster to put together. I found the best adhesive to put these together was the Tombo Multi Glue. The first picture is a comparison of the two sizes. I also made some with 4 circles, but they are pretty small and insignificant.


This is a great kit for only $19.95. I highly recommend this kit. Get it today HERE